Deposit a Plan
Depositing a plan publishes it to an external repository (such as Zenodo or Dataverse) and assigns it a DOI (Digital Object Identifier). The DOI provides a permanent, citable link to your plan.
- The deposit feature is available only on the Plan Overview page.
- Deposit is only available when the current plan status permits it. See Plan Statuses for details.
- The deposit repositories available to you depend on which Deposit Services your administrator has configured.
How to Deposit a Plan
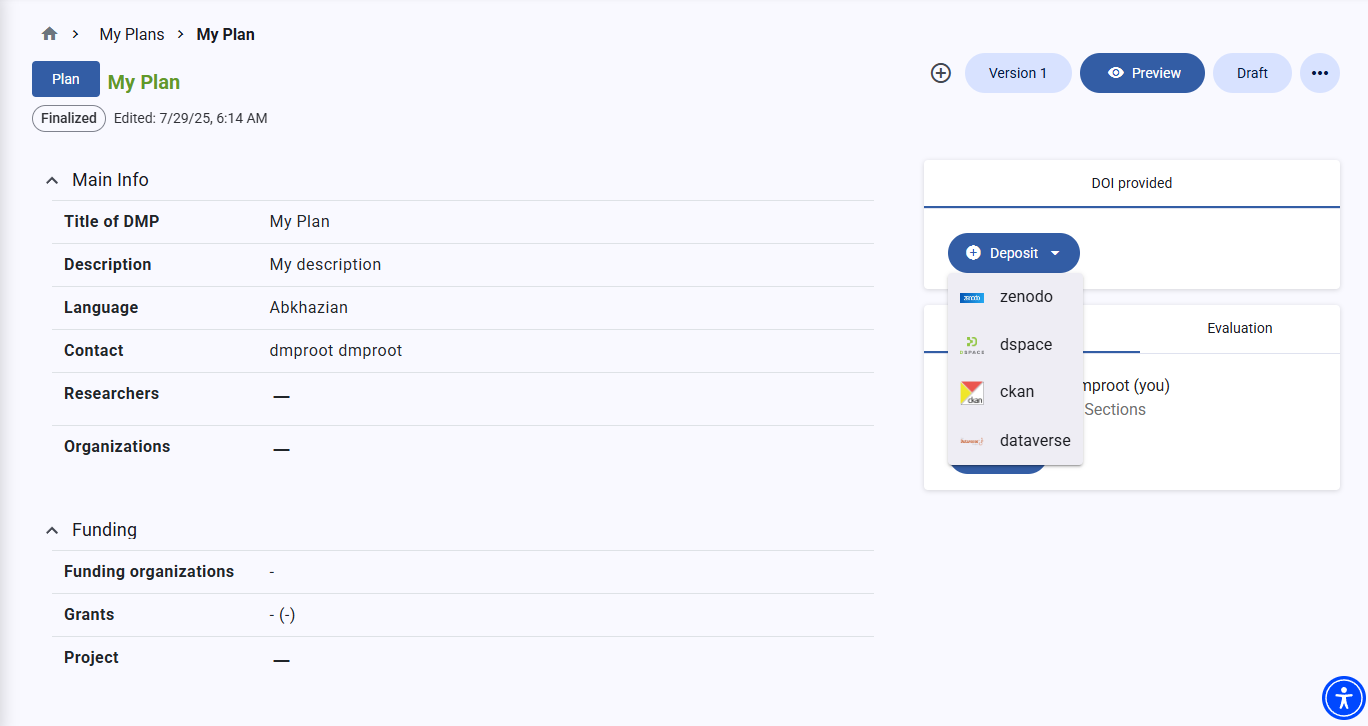
Step 1 — Open the Deposit Menu
On the Plan Overview page, click the Deposit button. A dropdown lists all available deposit repositories. Each repository is shown with its name and logo.
 Deposit a Plan
Step 2 — Select a Repository
Click the repository you want to deposit to.
If the repository supports more than one authentication method, a dialog appears asking how you want to authenticate. The options depend on the repository configuration:
| Option | Description |
|---|---|
| Login to [Repository] | Opens a browser popup to log in with your repository account (OAuth2 flow). Use this to deposit under your own repository identity. |
| Use your [Repository] credentials | Uses credentials you have saved in your Profile Settings. Available only if you have configured credentials for this repository. |
| Use default settings | Uses the system-level credentials configured by your administrator. No personal login required. |
Step 3 — Authenticate
Complete the authentication step for your chosen method:
- OAuth2 login: A browser popup opens redirecting you to the repository. Log in with your repository account and authorize the connection. The popup closes automatically when authorization is complete.
- Profile credentials / Default settings: No additional action required — the deposit proceeds automatically.
Step 4 — Deposit Completes
Once the deposit is successful:
- A confirmation message is displayed.
- The assigned DOI appears on the Plan Overview page alongside the repository name.
- All other collaborators on the plan receive an email notification informing them of the deposit.
If the deposit fails, an error message is shown. See Troubleshooting — Deposit Fails for common causes and solutions.
Depositing a New Version
If the plan was previously deposited, the deposit service automatically creates a new version of the existing repository record rather than a new entry. The previous DOI remains valid and points to the earlier version.
Viewing and Using the DOI
After a successful deposit, the DOI is displayed on the Plan Overview page. You can:
- Click the DOI to open the repository record in a new tab.
- Copy the DOI to include it in citations or references.
- Deposit the same plan to additional repositories to receive multiple DOIs.
See Also
- Deposit Services — the available repositories and how they are configured
- Plan Overview — where the Deposit button is located
- Troubleshooting — Deposit Fails — diagnose common deposit errors